
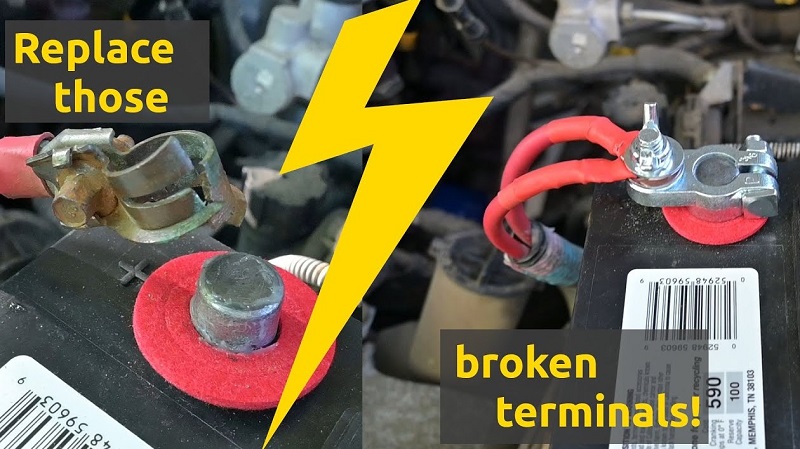
Replacing your car battery terminals is a critical maintenance task that ensures your vehicle starts reliably and keeps your electrical system healthy. This guide walks you through the simple process of identifying, removing, and installing new terminals to restore peak performance and prevent power loss.
If you have ever turned your key in the ignition only to hear a frustrating click, you know the sinking feeling of a car that refuses to start. While many people immediately assume the battery itself is dead, the culprit is often hiding in plain sight: the battery terminals. In 2026, as vehicle electronics become increasingly sophisticated, having a clean, solid connection to your battery is more important than ever for your car’s overall performance.
Replacing battery terminals is a rite of passage for every car owner. It is an affordable, straightforward DIY project that can save you a trip to the mechanic and extend the life of your entire electrical system. Whether you are dealing with years of built-up corrosion or a terminal that simply won’t stay tight, this guide will help you get back on the road with confidence.
Key Takeaways
- Safety First: Always wear protective eyewear and gloves, and disconnect the negative terminal first to prevent short circuits.
- Corrosion Check: Look for blue or white powder on your cables; this is a clear sign that you need to replace your battery terminals.
- Correct Sizing: Measure your existing cables before buying new parts to ensure a snug, secure fit for optimal electrical conductivity.
- Cleanliness Matters: Use a wire brush to clean the cable ends thoroughly before attaching the new hardware to ensure a strong connection.
- Tightness is Key: Ensure terminals are tightened firmly, but avoid overtightening, which can crack the battery post or strip threads.
- Final Protection: Apply a terminal protection spray or grease after installation to prevent future corrosion and oxidation.
Recognizing the Signs of Failing Terminals
Before you dive into the engine bay, you need to know what you are looking for. Your car will usually give you warning signs long before the battery terminals fail completely. Understanding these symptoms can help you prevent a breakdown before it happens.
The Presence of Corrosion
Corrosion is the number one enemy of a healthy battery. If you pop your hood and see a crusty, white, or blue-green powder gathering around the battery posts, that is oxidation. This substance acts as an insulator, blocking the flow of electricity from your battery to your starter and alternator. Over time, this corrosion eats away at the metal, making it impossible to get a tight connection even if you tighten the bolt as much as possible.
Intermittent Starting Issues
Have you ever noticed that your car starts perfectly one day but struggles the next? Or perhaps your dashboard lights flicker when you try to crank the engine? These are classic signs of loose or corroded battery terminals. When the connection is weak, the high current needed to start your engine cannot pass through the terminal efficiently. This creates a bottleneck, leading to that dreaded clicking sound when you turn the key.
Gathering Your Tools and Supplies
One of the best things about this project is that you do not need a fancy, expensive toolbox. You likely have most of the necessary items in your garage already. Having everything ready before you start will make the job much faster and smoother.
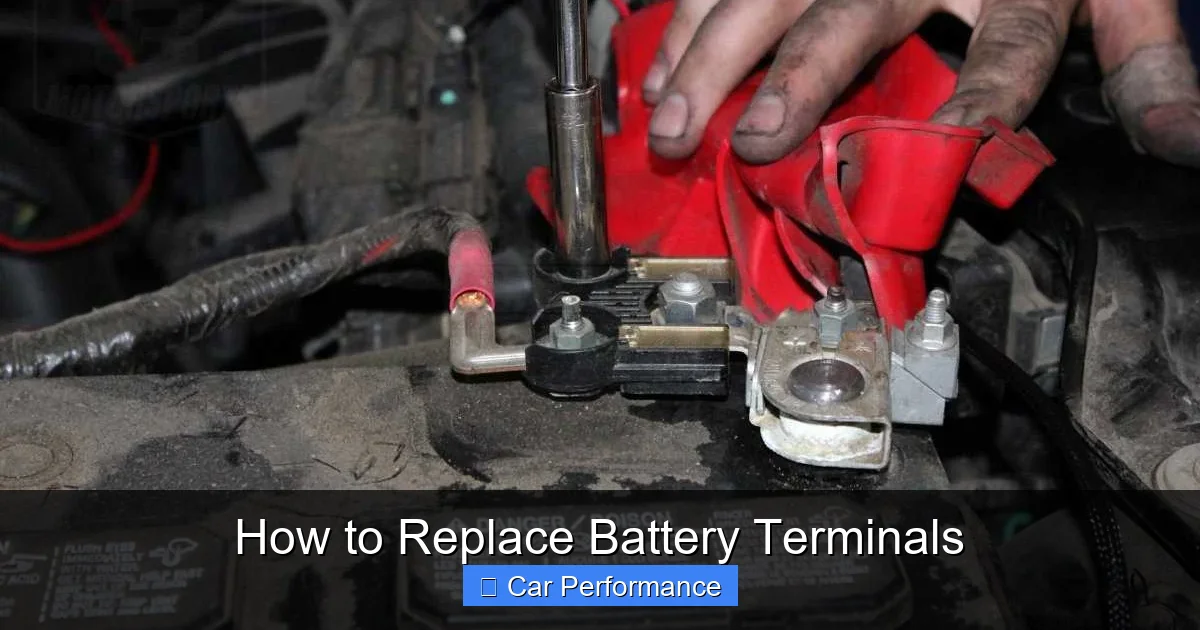
Essential Tools List
You will need a set of wrenches or a socket set. A 10mm wrench is the standard size for most battery terminal nuts, but keep a few other sizes nearby just in case. You will also need a stiff wire brush, often sold specifically as a battery terminal cleaner. A pair of wire cutters or strippers is vital if you need to trim away old, corroded wire ends to reach fresh copper.
Safety Gear and Supplies
Never underestimate the importance of safety. Battery acid is corrosive, and spark hazards are real. Always wear safety glasses to protect your eyes from debris or acid. Thick work gloves will keep your hands clean and safe. Additionally, grab a can of terminal cleaning spray or a bit of dielectric grease to finish the job properly. These small items make a huge difference in preventing the corrosion from returning next month.
Step-by-Step Removal Process
Now that you have your tools, it is time to get to work. Safety is the priority here. Always remember that your car’s chassis is grounded. This means you must be very careful when using metal tools near the battery.
Disconnecting the Negative Cable
Always disconnect the negative terminal first. The negative cable is usually marked with a minus sign (-) and is often black. By disconnecting this one first, you eliminate the risk of a short circuit if your wrench accidentally touches the metal body of the car while you are working on the positive side. Loosen the nut on the terminal clamp, wiggle it gently, and pull it off the post.
Removing the Positive Cable
Once the negative side is off, you can safely remove the positive cable, which is usually marked with a plus sign (+) and is often red. Loosen the nut, slide the terminal off, and tuck both cables aside so they do not accidentally touch the battery posts again. Now is the perfect time to inspect the cable wire itself. If the wire is black or green deep inside the insulation, you may need to cut it back until you see bright, shiny copper.
Installing the New Terminals
Replacing battery terminals is not just about slapping on a new piece of metal; it is about creating a clean, high-conductivity path for your vehicle’s electrical power. Precision here leads to long-term reliability.
Preparing the Cable Ends
If your old cable ends were cut off, strip back about half an inch of the insulation. Use your wire brush to scrub the exposed copper strands until they look brand new. If the copper is dull, the electricity will have a harder time flowing. If you are using a clamp-style replacement terminal, ensure the wire is inserted fully and that the set screws are tightened down hard. You want a permanent, metal-on-metal connection.
Attaching to the Battery Posts
With the new terminals securely attached to your wires, slide them onto the battery posts. Make sure the negative goes on last, just to be extra safe. Press them down firmly so they sit flush against the base of the post. Tighten the bolts until the clamp is immovable. If you can wiggle the terminal with your hand, it is too loose and will cause issues later.
Testing and Final Maintenance
The job is not finished just because the bolts are tight. In 2026, modern vehicles rely heavily on stable voltage, and a quick test will give you peace of mind that your efforts were successful.
Verifying the Connection
Start your car. It should crank with vigor and start quickly. If you have a digital multimeter, check the voltage across the terminals while the engine is running. You should see a reading between 13.5 and 14.5 volts, which indicates that your alternator is charging the battery correctly through your new, clean connections. If the voltage is low or fluctuating, double-check that your terminal connections are clean and tight.
Protecting Your Work
To keep your battery terminals in top shape, spray them with a terminal protector or apply a thin layer of dielectric grease. This creates a barrier against moisture and air, which are the primary causes of corrosion. A few seconds of work now will save you from having to do this job again for several years.
Conclusion
Replacing battery terminals is one of the most rewarding DIY tasks for any car owner. It is an immediate fix that noticeably improves starting performance and removes the anxiety of having a car that won’t turn over. By following these steps and keeping your connections clean, you are ensuring that your car continues to operate at its best.
Remember, your battery is the heart of your vehicle’s electrical system, and the terminals are the arteries. By keeping them clear and connected, you keep your engine running smoothly. Take pride in the work you have done, knowing that your car is now more reliable than it was before you opened the hood.
If you ever run into a situation where the car still won’t start after replacing the terminals, you can feel confident knowing you have already ruled out the most common electrical bottleneck.
Frequently Asked Questions
Do I really need to disconnect the negative terminal first?
Yes, always disconnect the negative terminal first to prevent a short circuit. If your wrench touches the car frame while the positive terminal is connected, it can cause a dangerous electrical spark.
How do I know which terminal is positive and which is negative?
The positive terminal is usually marked with a plus (+) sign and is often colored red. The negative terminal is marked with a minus (-) sign and is typically colored black.
Can I use any metal to replace my terminals?
You should always use high-quality lead or copper-alloy battery terminals specifically designed for automotive use. These materials offer the best conductivity and resist the harsh environment under your hood.
What if my battery cables are too short after I cut them?
If you have to cut away too much corroded wire, you might need to install a cable extension or replace the battery cable entirely. Never stretch a cable to make it fit, as this can put stress on the battery posts and cause cracks.
How often should I clean my battery terminals?
It is a good practice to check your battery terminals for corrosion during every oil change. A quick cleaning once or twice a year is usually enough to keep them in perfect working condition.
Is it okay to use grease on battery terminals?
Yes, using a light coat of dielectric grease or terminal protector after the connection is tightened is highly recommended. It prevents air and moisture from reaching the metal, which stops corrosion from forming.