Charging your car battery at home is a simple, cost-effective way to extend its lifespan and avoid expensive towing fees. By following the correct safety procedures and using a modern smart charger, you can easily restore power to a drained battery in just a few hours.
There is nothing quite as frustrating as turning your key or pressing the start button only to be met with that dreaded, rhythmic clicking sound. In 2026, our vehicles are more connected than ever, often putting extra strain on our electrical systems. Whether you left an interior light on or simply haven’t driven your car for a while, a dead battery can bring your plans to a screeching halt. Fortunately, learning how to charge a car battery with a charger is a fundamental skill that every driver can master.
You do not need to be a professional mechanic to bring your car back to life. With the right tools and a bit of patience, you can save yourself a trip to the repair shop. In this guide, we will walk through everything you need to know about the process, ensuring you stay safe while getting your vehicle charged up and ready for your next adventure.
Key Takeaways
- Safety First: Always wear eye protection and work in a well-ventilated area to prevent exposure to acidic fumes or sparks.
- Battery Type Matters: Identify if your vehicle uses a traditional Lead-Acid, AGM, or Lithium battery, as these require specific charging settings.
- Smart Chargers are Best: Use a modern, microprocessor-controlled charger that automatically stops when the battery is full to prevent damage.
- Terminal Care: Clean away any white, crusty corrosion from your terminals before connecting the charger to ensure a good electrical flow.
- Disconnecting Properly: Always remove the negative (black) cable first when removing the battery or charger to prevent short circuits.
Understanding the Basics of Battery Health
Before you start, it helps to understand what is actually happening under the hood. A car battery acts as an energy reservoir. It provides the initial surge of power needed to crank the engine and keeps your electronics running when the engine is off.
Over time, batteries naturally lose their ability to hold a charge. If your battery is more than five years old, it might be reaching the end of its life, but often, a deep charge is all it needs to regain its strength.
Choosing the Right Charger
In 2026, we have moved past the bulky, manual chargers of the past. Today, “smart” chargers are the gold standard. These devices communicate with your battery, sensing its current voltage and adjusting the charging rate accordingly. They prevent overcharging, which is the fastest way to ruin a battery. When shopping for a charger, look for one that features “float mode,” which keeps the battery topped off without damaging the internal plates.
Safety Equipment You Need
Never underestimate the importance of safety. Car batteries contain sulfuric acid and can release explosive hydrogen gas. Before you learn how to charge a car battery with a charger, make sure you have:
- Safety glasses to protect against accidental splashes.
- Rubber-soled shoes to prevent grounding yourself.
- A well-ventilated workspace, such as an open garage or driveway.
Step-by-Step: Preparing Your Battery
Before you hook up the cables, you need to prepare the battlefield. Start by turning off your vehicle completely. Ensure the ignition is off, all lights are dimmed, and the doors are shut. If your battery is buried deep under plastic covers or in the trunk, check your owner’s manual for specific instructions on how to access the terminals safely.
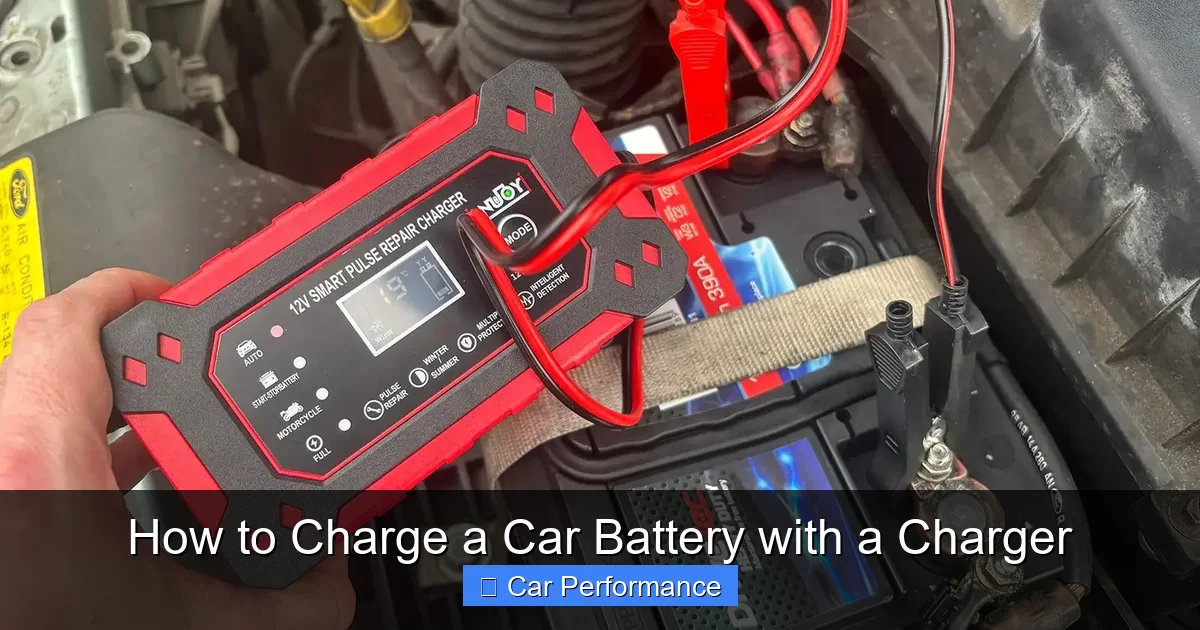
Visual guide about How to Charge a Car Battery with a Charger
Image source: media.whatcar.com
Cleaning the Terminals
Look at your battery posts. Do you see a white, powdery substance? That is corrosion, and it acts as an insulator, blocking the flow of electricity. If you see it, take a wire brush or even a piece of sandpaper and scrub it away. A clean connection is the difference between a successful charge and a charger that errors out because it cannot “see” the battery.
Checking for Damage
While you are cleaning the terminals, take a quick look at the battery casing. If the sides are bulging, leaking, or if there is a strong rotten-egg smell (sulfur), do not attempt to charge it. A damaged battery can become a fire hazard. In these cases, it is safer to take the unit to a local auto parts store for a professional assessment or recycling.
Connecting Your Charger Correctly
The sequence of connection is vital. If you get it wrong, you risk creating a spark, which can be dangerous near a battery that may be venting gas. Always follow the manufacturer’s instructions provided with your specific charger model, but the general rule is simple and consistent.
The Golden Order
First, connect the positive (red) clamp to the positive (red) terminal on your battery. It is usually marked with a plus (+) sign. Second, connect the negative (black) clamp to the negative (black) terminal, usually marked with a minus (-) sign. If your car has a dedicated ground point on the chassis, some experts recommend using that instead of the negative terminal, but for most home charging, connecting directly to the terminal is acceptable.
Powering Up
Only after the clamps are secure should you plug your charger into a wall outlet. Many smart chargers will now show an error code if you have reversed the polarity (red to black), protecting your car’s delicate electronics from a surge. Once plugged in, select the correct setting usually “12V” or “Automotive.” Some chargers have “AGM” settings for modern stop-start engines; make sure you select the mode that matches your battery type.
Monitoring the Charging Process
How long does it take? That is the million-dollar question. Depending on the size of your battery and how dead it was, a full charge can take anywhere from four to twelve hours. If you are using a fast-charger setting, it might be quicker, but slow and steady is always better for the health of your battery plates.
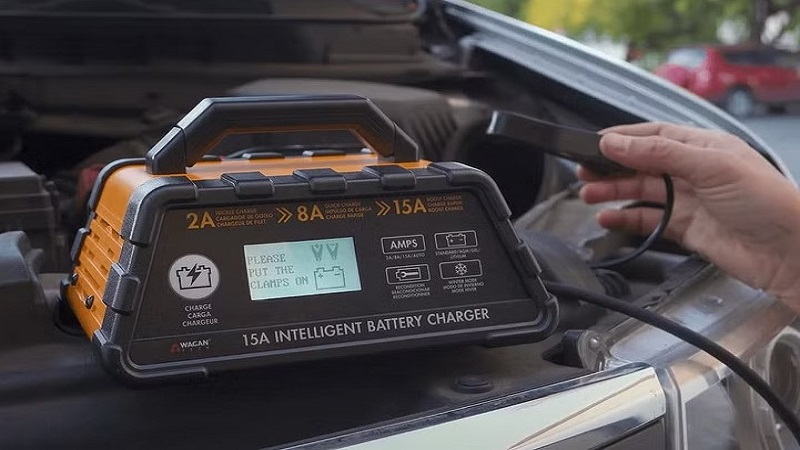
Understanding the Interface
Most modern chargers have an LED display or a set of indicator lights. You might see a “Bulk” phase, an “Absorption” phase, and a “Float” or “Ready” phase. The “Bulk” phase puts in the heavy lifting to get the battery to about 80% charge. The “Absorption” phase slows the rate to gently fill the remaining capacity. Once you see the “Full” or “Maintenance” light, you can rest easy knowing the job is done.
Troubleshooting Common Issues
If the charger says “Error” or “Check Battery,” it could mean one of three things: the connection is loose, the battery is deeply discharged beyond the charger’s ability to recognize it, or the battery has a bad cell. Try wiggling the clamps to ensure they have a firm bite on the metal. If it still fails, the battery may simply be too old to hold a charge anymore.
Finishing the Job and Disconnecting
Patience is your best friend here. Once the charger indicates that the process is complete, you are ready to disconnect. The removal process is the exact reverse of the setup. First, unplug the charger from the wall outlet. Then, remove the negative (black) clamp from the battery. Finally, remove the positive (red) clamp. Never leave the charger plugged in and running indefinitely unless it is specifically designed for long-term maintenance.
Testing Your Success
After you have removed the charger, start the car. It should crank over with more vigor than before. Let the engine run for about 15 to 20 minutes. This allows your car’s alternator to finish the job and confirm the battery can hold a charge while the vehicle is in operation. If the car starts fine, you have successfully saved yourself a service call.
Maintenance Tips for 2026 and Beyond
To avoid needing to learn how to charge a car battery with a charger again too soon, keep an eye on your vehicle’s electrical health. If you are not driving your car often, invest in a “battery tender” or “trickle charger.” This is a smaller device that stays connected to your car in the garage, keeping the battery at an optimal voltage so it is always ready to go when you are.
Keep the Battery Warm
In colder months, chemical reactions inside the battery slow down, making it harder to start the car. If you live in an area with harsh winters, parking in a garage or using an insulated battery blanket can significantly improve performance.
Regularly checking your battery’s health is just as important as changing your oil. When you get your car serviced, ask the mechanic to perform a “load test” on your battery to see how much life it has left.
Ultimately, learning to maintain your own battery is about independence. It is one of the easiest DIY projects you can perform, and it provides a great sense of accomplishment. By taking care of your vehicle’s power source today, you ensure that your car will be ready to take you wherever you need to go tomorrow.
Conclusion
Mastering how to charge a car battery with a charger is a valuable skill for any vehicle owner in 2026. It saves time, saves money, and gives you the confidence to handle minor automotive hiccups without stress.
By prioritizing safety, using the right tools, and following the correct connection sequence, you can keep your battery in top shape for years to come. Remember to check your terminals, choose a smart charger for the best results, and never ignore the signs of a failing battery. With these tips in your toolkit, you are always prepared for the road ahead.
Frequently Asked Questions
Is it safe to charge a battery while it is still in the car?
Yes, it is perfectly safe to charge a battery while it is still installed in your vehicle. Just ensure the ignition is turned off and the charger is compatible with your car’s electrical system.
How long should I leave the battery on the charger?
Most modern smart chargers will automatically stop or switch to a maintenance mode once the battery is full. Generally, you should allow between 4 and 12 hours depending on how drained the battery was.
Can I use a trickle charger for long-term storage?
Absolutely, a trickle charger or battery tender is the best way to keep a battery healthy if you aren’t driving your car frequently. It prevents the battery from going flat and extends its overall lifespan.
What if my battery is frozen?
If you suspect your battery is frozen, do not attempt to charge it, as it may crack or even explode. Bring it into a warm, indoor environment and let it thaw completely before attempting to charge it.
Does a fast charger damage the battery?
While fast chargers are convenient in an emergency, they can cause heat buildup which may shorten a battery’s life if used constantly. For regular maintenance, a slower, controlled charge is much better for the battery plates.
How do I know if my battery is completely dead and needs replacing?
If you have charged the battery fully and it still fails to start the car, or if it loses its charge again after only a few days of driving, it likely has a dead cell and needs to be replaced.